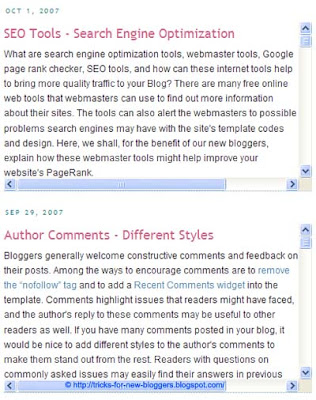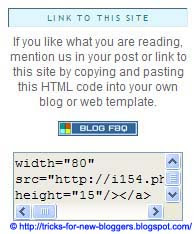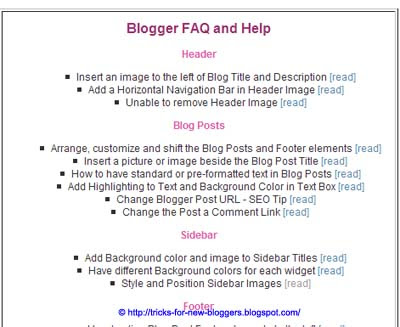
If you have followed our main article Add Scrollbars to Blog Widgets, you would be able to introduce horizontal and vertical scrollbars to all or any of the widgets in the Blogger template. These scrollbars can be made to automatically appear when the contents overflow a certain specified width or height setting. We have also talked about how scrollbars can be added to the Blog Post body. We shall in this tutorial elaborate on that and let you know how to add the scrollbars within each Blog Post.
Scrollbars to Blog Post body
As we had mentioned in our article, to have the scrollbars to each of the blog posts, once you are logged into Blogger account, go to Template -> Edit HTML and scroll to this code. Add the portion shown in red:-
Scrollbars to Blog Post body
As we had mentioned in our article, to have the scrollbars to each of the blog posts, once you are logged into Blogger account, go to Template -> Edit HTML and scroll to this code. Add the portion shown in red:-
.post { height:200px; overflow:auto; } |
|---|
This will give you scrollbars to every post:-

Scrollbars within Blog Post
Sometimes, you may not want to have the scrollbars to all the blog posts, but only for several paragraphs within a post. Assuming you are writing an article and you wish to enclose some long text within a scrollbox, you have to first define a class within the stylesheet.
For example, we can insert in the stylesheet this code to specify the maximum height and width of the scrollbox. Once the text overflows this setting, scrollbars will automatically appear:-
.scrollbox { height:100px; width:400px; overflow:auto; } |
|---|
Save the template. Next, when you are writing a post, switch from the “Compose” mode to the “Edit HTML” mode.

Add these tags (shown in red) before and after the part of the text that you want to enclose within the scrollbox.
<div class="scrollbox">TEXT TO BE INCLUDED IN THE SCROLLBOX.</div> |
|---|
You can continue typing the post by switching back to the “Compose” mode.
After you are done, when you publish your post, you will see that only the part of the text comprised with the tags will be in a scrollbox, like this:-

Adjust the size of the scrollbox in the stylesheet accordingly. You can also consider having a HTML text box to enclose certain text.
© Tricks for New Bloggers
Found this article useful? Mention us in your post, subscribe to our feed, link to us, or bookmark this site. Thanks for your support!
Separator Line between Each Comment
If you have noticed by now, the readers' comments after each Blogger post come one after the other without a line separating each comment. If your post has numerous comments, it is difficult even for readers to locate their own comments. A solution to this is to add a divider or a separator line after each comment so that readers can easily see where the comment starts and ends. We had explained in our article Author Comments - Different Styles how blog owners can make their own comments different and stand out from the rest. Here, we shall let you know how to insert a divider or underline after each comment to separate the various comments.
Login and go to Template -> Edit HTML. Scroll through the template to locate this:-
Login and go to Template -> Edit HTML. Scroll through the template to locate this:-
#comments-block .comment-footer { |
|---|
In templates other than the Minima template, you may see this instead:-
.comment-footer { |
|---|
Insert under that the following line:-
border-bottom:1px dotted $bordercolor; |
|---|
This adds a thin line at the bottom of each comment. You can have a thicker line with a different color. Just change the above code to this:-
border-bottom:2px solid #736AFF; |
|---|
For more variations and ideas on how to customize this separator line, take a look at Add or Remove Borders in CSS Templates.
Finally, if the line is too close to the end of the comments, you can add a little spacing between the comments and the separator line. Either insert this extra padding code, or if it already exists, adjust the values. Save the template, click any article to view the comments and go back to change the padding values if necessary.
padding:0 0 1px 0; |
|---|
The first value is for the top spacing, the second is for the right, the third is for the bottom, and the fourth is for the left. In our example, we have added a 1px spacing at the bottom of the comments footer.
© Tricks for New Bloggers
Found this article useful? Mention us in your post, subscribe to our feed, link to us, or bookmark this site. Thanks for your support!
SEP 29, 2007
Center Align Page Elements
A number of queries we received had to do with alignment problems. In some templates, the links, text, widgets and other page elements are aligned to the left. Many bloggers prefer to have widgets in the center of the sidebar or post body. There are a couple of ways to align the page elements within the sidebar or the blog posts. In this tutorial, you will learn how to center align all or selected page elements in your blog.
Header Alignment
If you are looking to center align the Header Title, Description and Header image, look up our other guides - Header Image and Title Alignment (I) for Minima, Denim, Rounders, Herbert, Jellyfish, Harbor and Scribe templates; and Header Image and Title Alignment (II) for the Dots, No. 897, No. 565, Thisaway, Moto, Snapshot, TicTac, Tekka, Sand Dollar and Simple II templates.
Center align all the elements
The general alignment codes are found in the stylesheet. Go to Template -> Edit HTML. If you want the elements in the sidebar to be in the center, try looking for this and insert the alignment code (shown in red):-
#sidebar-wrapper{ text-align:center; } |
|---|
In different templates, the CSS classes are named differently. Hence, if you can't find the above, look for any of these and insert the code:-
#sidebar #sidebar-wrap #side .sidebar |
|---|
Do not save the template. Preview the Template. The text and elements in the sidebar should be in the center and not aligned to the left.

In the same way, if you want the elements in the main post body to be in the center, add the code here:-
#main-wrapper{ text-align:center; } |
|---|
If you don't see this in your template, try inserting the code under any of these or words to that effect and preview the template.
#main #main-wrap .main |
|---|

To center align the Footer elements, the code can be inserted under any of these:-
#footer .footer |
|---|
Center align one element
Suppose you want only one element to be aligned in the center. After you have created that element, be it a picture or widget or text, go to Template -> Edit HTML and scroll to somewhere near the bottom. Look for the widget ID. For example, if we have added a HTML code, a link list and a labels widget in the sidebar, we will see this:-
<div id='sidebar-wrapper'> <b:section class='sidebar' id='sidebar' preferred='yes'> <b:widget id='HTML1' locked='false' title='HTML Code' type='HTML'/> <b:widget id='LinkList1' locked='false' title='Links' type='LinkList'/> <b:widget id='Label1' locked='false' title='Labels' type='Label'/> </b:section> </div> |
|---|
The highlighted text are the widget IDs. Scroll further up the template and insert after a } character the alignment code like this:-
#HTML1{ text-align:center; } |
|---|
Replace the part in green with the relevant ID. This will center align only that particular page element.
DIV alignment tags
The other way to align an element is to insert the DIV alignment tags. Let's say you have created a HTML page element to insert a widget, image links, stat counter, etc. Insert these tags before and after the HTML Code to align that element in the center.
<div style="text-align:center;">HTML Code of widget</div> |
|---|
Center align element in Blog Post
You may center align a picture, code, table, link or text within a blog post. Just block the part you want to put in the center and click the center-align icon in the Post Editor:-

Alternatively, you can switch from the “Compose” mode to the “Edit HTML” mode. Insert these tags and what goes in between will be in the center.
<div style="text-align:center;">TEXT TO BE CENTERED</div> |
|---|

Comments :
0 comments to “Add Scrollbars to Blog Posts”
Post a Comment